

I’ve spent years attempting the perfect crunchy crust for my baguettes with varying degrees of success. However, if your bread’s destiny is to become a delicious sandwich, you need a soft, crisp crust, and that’s not always easy to achieve. I had high hopes for the pan de agua, but its crust was not quite as soft as I’d hoped.
A few weeks ago, however, I started reading about creating soft bread with a Japanese method called “tangzhong.” The technique is very simple: you create a kind of roux with flour, water, and milk (in my case, almond milk). You add this tangzhong starter to the rest of your bread ingredients and the result is a much softer dough with a crispy, but soft crust.
I researched recipe after recipe for breads using a tangzhong starter and all of them included eggs, butter, and milk. All the recipes were also a bit fussier than I like. I prefer making a straightforward bread with three ingredients (well, four, if you count water): flour, yeast, salt….water.
I wasn’t sure whether the tangzhong starter worked only on Japanese milk bread and brioche-type buns, so I decided to try two experiments. Now, we all hate wasting ingredients on experiments, but bread experiments are rarely inedible. The worst that could happen with my experiments is that the results would be delicious, hot bread…with a crunchy crust!
For my first experiment, I decided to try making a basic baguette recipe and simply adding the tangzhong starter to it. I also included a new technique (autolyse) I’ve been trying of late: I allow the dough sit for twenty minutes before I add salt and knead the dough. I used a basic baguette recipe from Dough: Simple Contemporary Bread by Richard Bertinet. I did not hold out high hopes for this experiment, but it worked BRILLIANTLY! The two baguettes were soft and the crumb was perfect, and the crust was soft and perfectly crispy!
Here’s my technique:
Soft Crispy Vegan Sandwich Baguettes
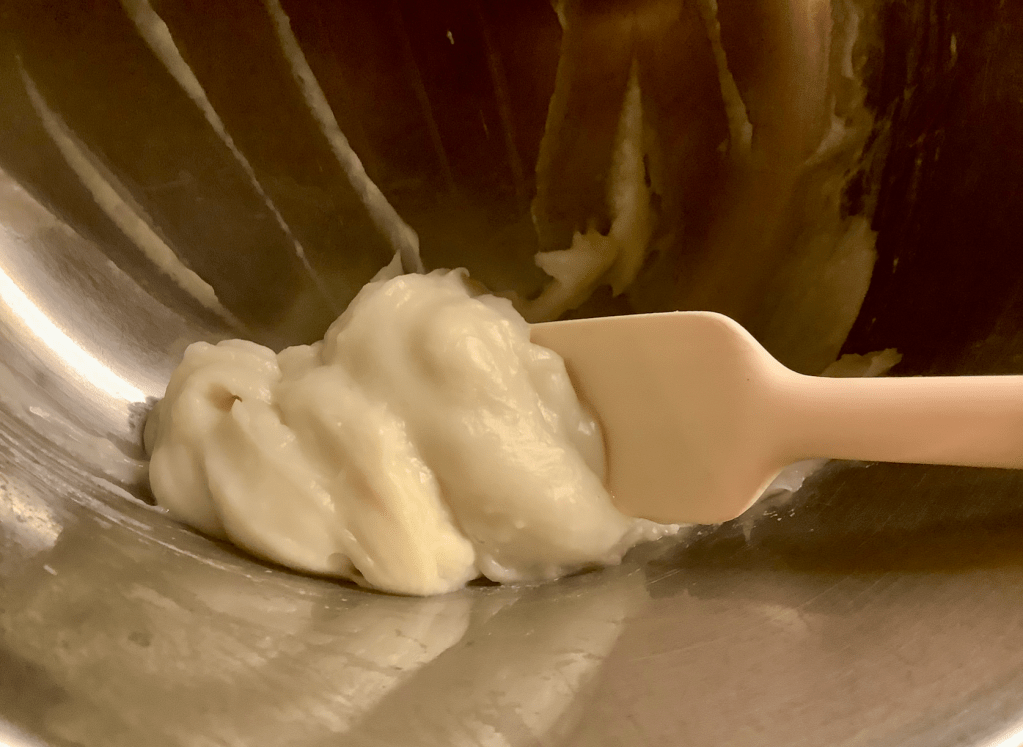
First, make the tangzhong starter:
Add to a saucepan:
- 2 TBS (20g) flour
- 2 TBS (27g) water
- 4 TBS (60g) almond milk
Whisk constantly at medium heat until a roux forms; remove from heat and set aside.
Next, add to a stand mixer bowl and whisk together:
- 1.5 tsp yeast
- 4 cups flour
Next, mix your tangzhong starter whisked together with….
- 13 fluid ounces water
Start the mixer and pour the water-tangzhong mixture into the bowl. Mix until all the flour has been incorporated and then let the dough sit for twenty minutes to allow it to autolyse. Next, add:
- 2 tsp salt
Mix in the salt and allow the mixer to knead until the dough is smooth and the dough is coming away from the sides of the bowl. The dough may be quite shaggy, but don’t add more flour. Scoop the dough into a lightly oiled bowl, cover, and let it rise in a warm place for an hour and a half or so until doubled in size.
Once the dough has finished proofing, flour a smooth surface, pour the dough onto it, and cut into two even pieces. Add more flour as needed to be able to work on the dough, but try not to add too much. Flatten each piece into a long rectangle and roll it very tightly lengthwise. Place seam-side down into a well-oiled baguette pan, cut a few diagonal lines into the crust, cover with a tea towel, and let rest while the oven temperature reaches 450.
Bake at 450 for about twenty to twenty-five minutes. I ALWAYS use an internal thermometre to ensure my bread is done, and have found that the ideal temperature is 207 degrees.
Remove from the oven onto a cooling rack and let cool for thirty minutes before slicing.
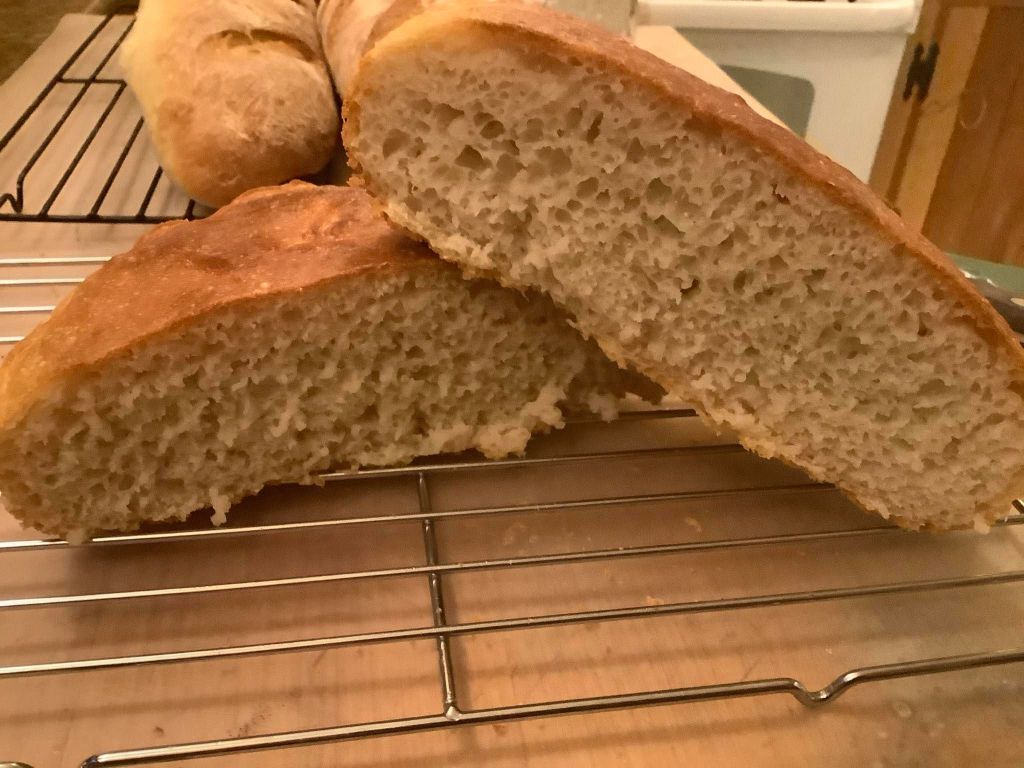
When I first removed the bread from the oven, the crust seemed a bit harder than I expected, but after thirty minutes, it was PERFECT. I was able to slice it lengthwise and use half to make a sub sandwich for James for dinner!

So now for my second experiment. I REALLY did not expect this one to go well, and right up until the bread was cool, I assumed it was a failure. I was wrong!
For this attempt, I removed a boule-sized chunk of dough from the jug of bread dough I always have in the fridge. I’d made this dough a couple of weeks ago, so it was more liquid-y than usual with lots of big bubbles and a sourdough-y smell. I put the dough in the bowl of a stand mixer, covered it and let it sit for a couple of hours to get to room temperature. Meanwhile, I created another tangzhong starter, and when the dough was nearing room temperature, I added it to the mixing bowl and mixed it together. The dough did not need to be kneaded, since the gluten had already formed when I made it a couple of weeks ago. By this point, the dough was beyond shaggy: it was more like a gummy pancake batter than anything else. It was completely unform-able (though I did try!). I eventually gave up trying to shape it and just poured the “batter” into a small, well-oiled dutch oven, covered it, and let it sit on the counter for an hour or so while I fussed with the other dough. I baked it, uncovered, for about thirty minutes–to an internal temperature of 207 degrees. When I removed it from the oven and popped it out of the dutch oven and onto the cooling rack, it seemed like a failure: a hard, dense disk. After thirty minutes, however, the bread disk had transformed into a lovely, crispy round loaf. Turn the sound on for this video in order to hear the crunch!
And the interior is lovely as well! Look at that crumb!
For my next experiment, I am going to try adding the tangzhong starter to my jug bread at the beginning of the batch. I usually get four loaves out of one jug of dough over the course of a couple of weeks. It will be interesting to see whether the tangzhong continues to retain hydration throughout the evolution of the jug bread! I will report back on the results!
And our song of the day is James Taylor’s “Hard Times” because James was just playing/singing it:

Looks like a lovely texture!
LikeLike
looks great!
LikeLike